So today I thought I’d take a chance to give a review of an
application that can be very useful and has come to the rescue before.
The program that I’m talking about is called “Recuva” and is used to recover files that have been deleted.
Normally, when you delete a file in a Windows OS the file is moved to the “Recycle Bin” (unless you have disabled the recycle bin, or the file is too big for the recycle bin.) But after you empty the Recycle Bin, it’s gone forever right?
The answer is no. When a file is removed from the recycle bin, it’s still on your hard drive (or SD card, or thumbdrive, etc.) it’s just been marked by the operating system to be deleted. This means that until the OS needs that space for another file, it’s still there, although you can’t see it.
Recuva, allows you to find files that have been “deleted’ but are still hanging around. Recuva is made by Pirirform, the makers of CCleaner and Defraggler. All of these software applications are free to download and use, but if they help you out, consider making a Pay Pal donation through the website to the company for their hard work.
A quick note. Recuva finds files that have been marked for deletion but have not been overwritten yet. If you download the Recuva app to the hard drive that contains the files you are trying to recover, then there is a good chance that you may overwrite those files with the Recuva program. The best thing to do is download it and install it before you need it so that you won’t overwrite the files, or you can download and run the program from a thumb drive or external drive (i.e. portable mode).
I’ll walk you through an example of how to use the program. So let’s say I have an SD Card in my Windows PC that has some vacation pictures on it, and I accidentally delete them and they’re not in the Recycle Bin. Fire up Recuva, this opens the “Recuva Wizard”:
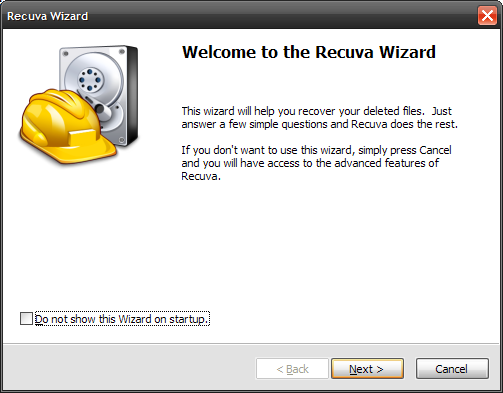
Click next. The next screen gives you a listing of file types to recover:
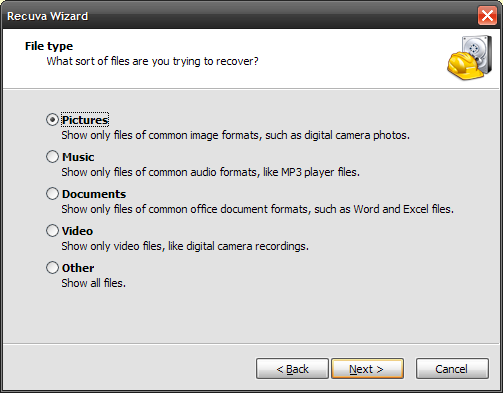
So I’ll select “Pictures” and click Next again. The next window asks where the files are located. If you’re not sure you can click the first option which will search the entire computer for files indexed as deleted. Depending on the size of the hard drive this could take some time, so it’s best to narrow down the search if you can. You can also select: My Documents, media card or iPod, the Recycle Bin, or you can browse to a specific directory location. I’m going to select the “G” drive, because I know that is the location of my SD card.
You may also like
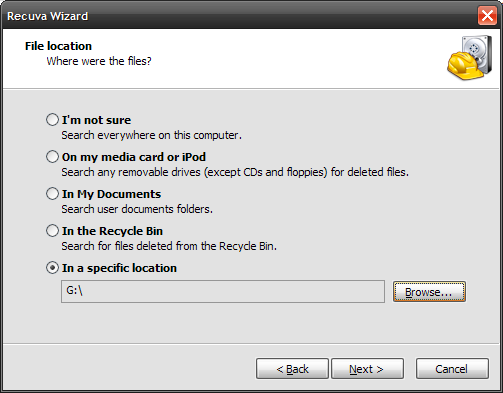
Click Next again. Recuva lets you know that it will now attempt to recover the files in the location you have selected. Click Start to begin or Back to change something on a previous screen. You can also select a “deep scan” for a more in depth search. This could take some time. Since we’re just showing an example I click Start.
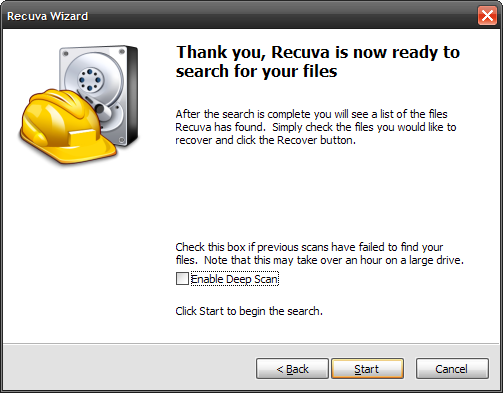
And now we see that not only did Recuva find the files I recently deleted, but it also found some old graduation photos that were still on the flash card that had not been overwritten yet. So just simply check the files to recover and click the “Recover” button in the bottom right.
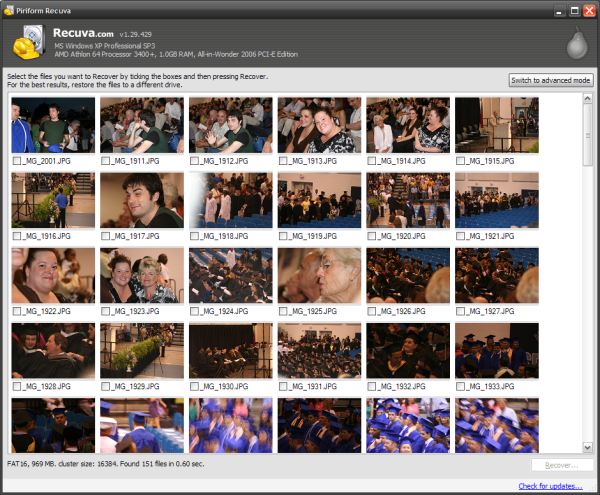
When you choose your files and click recover, you can then browse to the location on your computer that you would like the files to be placed. To easily find them I’ll go to my Desktop.
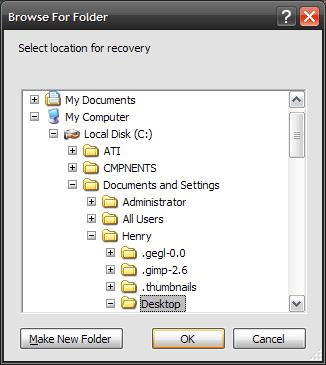
Click OK and you’ll get a progress bar showing the file recovery:
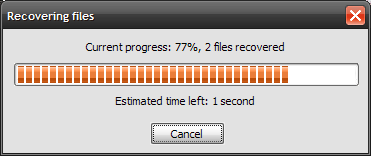
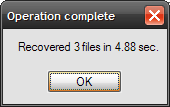
And then another box when it’s complete:
Now the wizard is meant to be easy and simplistic. There are a lot of other advanced options you can access by going through the Recuva menu.
As always, if you have any questions or have a topic you’d like to see in a future blog, leave me a comment. Thanks for reading.
Normally, when you delete a file in a Windows OS the file is moved to the “Recycle Bin” (unless you have disabled the recycle bin, or the file is too big for the recycle bin.) But after you empty the Recycle Bin, it’s gone forever right?
The answer is no. When a file is removed from the recycle bin, it’s still on your hard drive (or SD card, or thumbdrive, etc.) it’s just been marked by the operating system to be deleted. This means that until the OS needs that space for another file, it’s still there, although you can’t see it.
Recuva, allows you to find files that have been “deleted’ but are still hanging around. Recuva is made by Pirirform, the makers of CCleaner and Defraggler. All of these software applications are free to download and use, but if they help you out, consider making a Pay Pal donation through the website to the company for their hard work.
A quick note. Recuva finds files that have been marked for deletion but have not been overwritten yet. If you download the Recuva app to the hard drive that contains the files you are trying to recover, then there is a good chance that you may overwrite those files with the Recuva program. The best thing to do is download it and install it before you need it so that you won’t overwrite the files, or you can download and run the program from a thumb drive or external drive (i.e. portable mode).
I’ll walk you through an example of how to use the program. So let’s say I have an SD Card in my Windows PC that has some vacation pictures on it, and I accidentally delete them and they’re not in the Recycle Bin. Fire up Recuva, this opens the “Recuva Wizard”:

Click next. The next screen gives you a listing of file types to recover:

So I’ll select “Pictures” and click Next again. The next window asks where the files are located. If you’re not sure you can click the first option which will search the entire computer for files indexed as deleted. Depending on the size of the hard drive this could take some time, so it’s best to narrow down the search if you can. You can also select: My Documents, media card or iPod, the Recycle Bin, or you can browse to a specific directory location. I’m going to select the “G” drive, because I know that is the location of my SD card.
You may also like

Click Next again. Recuva lets you know that it will now attempt to recover the files in the location you have selected. Click Start to begin or Back to change something on a previous screen. You can also select a “deep scan” for a more in depth search. This could take some time. Since we’re just showing an example I click Start.

And now we see that not only did Recuva find the files I recently deleted, but it also found some old graduation photos that were still on the flash card that had not been overwritten yet. So just simply check the files to recover and click the “Recover” button in the bottom right.

When you choose your files and click recover, you can then browse to the location on your computer that you would like the files to be placed. To easily find them I’ll go to my Desktop.

Click OK and you’ll get a progress bar showing the file recovery:

And then another box when it’s complete:

Now the wizard is meant to be easy and simplistic. There are a lot of other advanced options you can access by going through the Recuva menu.
As always, if you have any questions or have a topic you’d like to see in a future blog, leave me a comment. Thanks for reading.


